Friday, November 20, 2015

Colorizing

Before
Hello all of you out there in the world of the Internet, this post is going to show a quick tutorial about how to colorize a boring picture and make it something fantastic.

I mean really, doesn't that object look so much better now that it has a proper background and a rainbow smile. I think it does.

So for starters what you will need to do is choose a picture using some sort of free photo website or you can look on Google using the search tools and making sure the photo is one that can be reused.
After


Once you have chosen your picture you can go into photoshop and cut out the object you want to use for the picture using the pen tool. Click points all around the object and then up at the top of photoshop click on the make selection button. Once it makes the selection click on the new layer button and the object should appear in the new layer as long as it is selected.

Next is the part where you can let your imagination soar with all kinds of ideas that will help to enhance your image. Remember that each photo is different and should be tailored to its own needs. For the photo I used, I added a small circle around the logo at the top so it would sort of look like an eye. Then I added a inner and outer glow of the same color to make it stand out a little more. Next I used the pen tool to make a custom shape for the mouth and added a rainbow gradient for the fill. After that I added a gradient over the entire machine by first using the pen tool again to outline the shape of the machine, then I turned the outline into a shape by clicking on the shape button, and finally in order to make the object still visible I turned down the opacity to 50%. Lastly I added a picture for the background to make it all just come together.

Well there you go, a Crash Course in image enhancement.

see you soon people of the internet.
Jake Smith

Thursday, November 5, 2015

What the Font?!?!?!?!

       This is unbelievable folks, something so amazing has happened that Jake is almost too excited to to tell you. For this first time in web class history the teacher has let us use the fonts we want instead of having to go mainstream and use the normal bland fonts. It feels like some kind of weight has been lifted off Jake's shoulders and Jake can now breathe easier. For the first time in this class Jake feels free; Free to make his own choices and finally have the design of his dreams. Jake believes that this is the beginning of a beautiful relationship between Jake and the new fonts of the world.

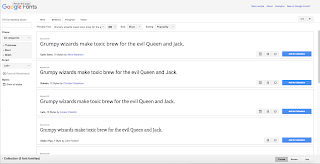
       Ok people, pleasantries aside today I am going to teach you how to find and use different fonts that you can use through the future world tyrant Google. So for starters it is a good idea to make sure you are in the right place or you will get lost easily.

       You will need to go to https://www.google.com/fonts, from there you can search around until you found the web font of your dreams, or at least one that is close enough.


       Next you will need to click on the little box that has an arrow pointing to the right.


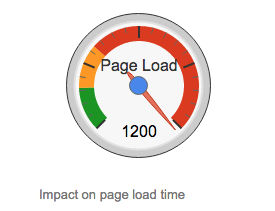
       When it takes you to the next page you then have some choices, you can choose the different options there but be careful because this can be a danger to your site because if you use too much it can seriously slow down the loading on your site.


       Once you have made all of your choices you will need to look for the box, as shown to the right, that says standard, import, and javascript along the top. Once you see it click on import, than copy the text that is on the inside of the box.


       Go to your site on dreamweaver and paste this text at the top of your CSS code. Hopefully it should look like this when you put it in.

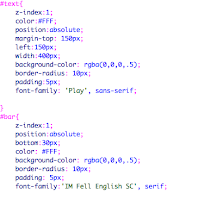
       Next, in the CSS, type up the font family CSS and then look back on the font site. Back on the site it will show you what you need to type in, it is a better idea to type this one in instead of copying because dreamweaver is weird with apostrophes.

      Your coding that says font family should look pretty similar to the coding here, just like normal but with the web fonts of your choosing.

       Now would be the opportune time to test it, go ahead and save and preview if it works you should see your new font. If it didn't work then you did something wrong because my directions are so awesome you can't mess them up. No really If it doesn't work then go through the steps again.


Well that is all people, have fun and use your web font choices for good. I know I won't, so until I type again,

Jake Smith